
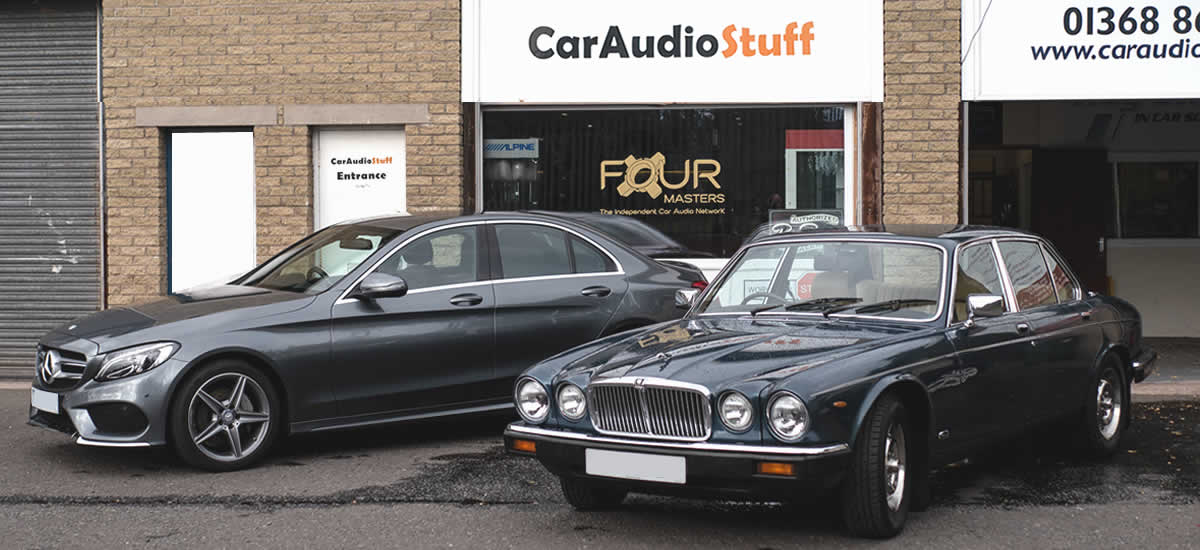
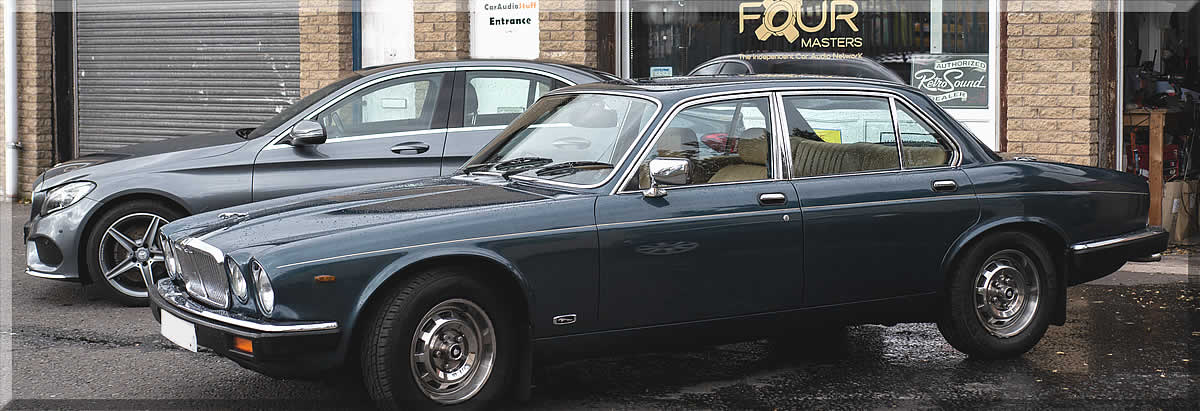
How to make a thirty-five-year-old Classic behave like a new Mercedes.
I recently made a bonkers decision that I would hand back my two-year-old Merc C200 (at the end of its PCP deal) and buy an old Classic car as my daily runabout since I do so little mileage, but, I do like my creature comforts.
I have enjoyed all the toys in the Mercedes although it has not been without its problems, mainly faulty sensors in the electronics. So, my wish list for the replacement car was to have, number one, a decent radio and sound system. I had upgraded the Merc speakers, but the radio tuning was abysmal (not easy or intuitive to tune).
Next, it should have bright LED lights, and automatically come on when dark. Blip operated central locking with a decent alarm system. All my cars get fitted with trackers anyway. All round parking sensors and a rearview camera as well as front and rear witness cameras. Of course, it would need a decent navigation system in it too. Not too many old cars have these features although I was relishing the chance to retrofit them.
So, what was to be the donor car?
‘They don’t make cars like they used to’ is a phrase often quoted by old people wound tight in the grip of nostalgia. But nostalgia lies. They don’t make cars like they used to, because old cars are generally rubbish. They leak, they break down, they’re slow and they smell of unspecific grandparents.” (Top Gear – Tom Ford)

Play text


But there is another way. Because there are people out there who like the style of the old with the convenience of the new. The resto-mod crowd. And the movement is growing as I have just joined it…
After a bit of searching, I found a 1983 XJ6 Jaguar, it was a 4.2, series 3 with only thirty-four thousand miles on the clock, now the fun begins.
Driving the car down from north of Dundee it was quickly apparent that some small details needed attention. The headlights had a mind of their own and the horn was a makeshift button fitted to the side of the centre housing and the dash lights were non-existent. and the squeaks and rattles that were coming from the steering stalk switches were frightening. The car drove very well though.
The radio was an old Clarion cassette player and it was busted, no problem, Since this is to be our Retrosound Classic car radio demonstrator and I have great plans for the audio system in this car.
First things first, let’s get this thing running properly and then we can begin.

Play text


Radio needs a good antenna.
The aerial mast was stuck up so upon investigation we could see the problem was that the electric antenna system had been butchered.
We had a replacement in stock Jaguar Electric Aerial The tail lamp housing and the rear boot floor had to be dismantled to accommodate the new bendy remote aerial and it was gliding up and down silently in no time.
Fist job done, now those lights…
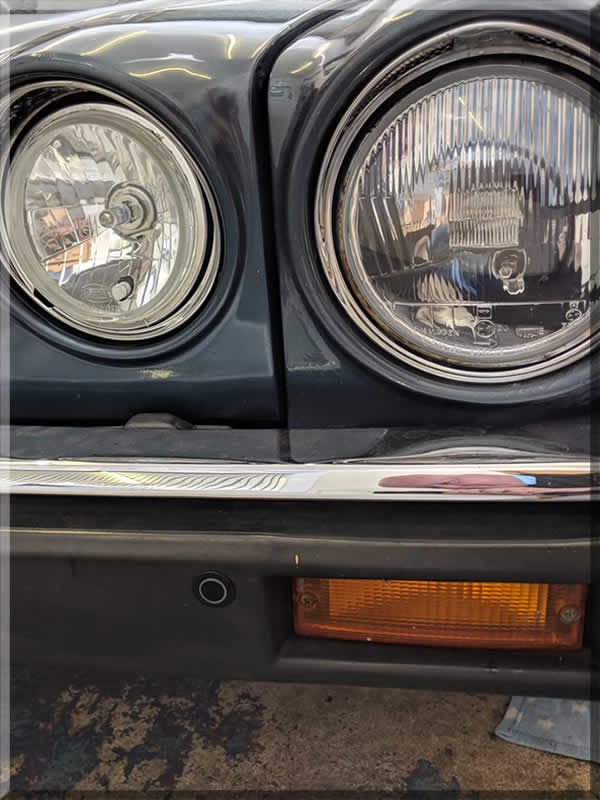
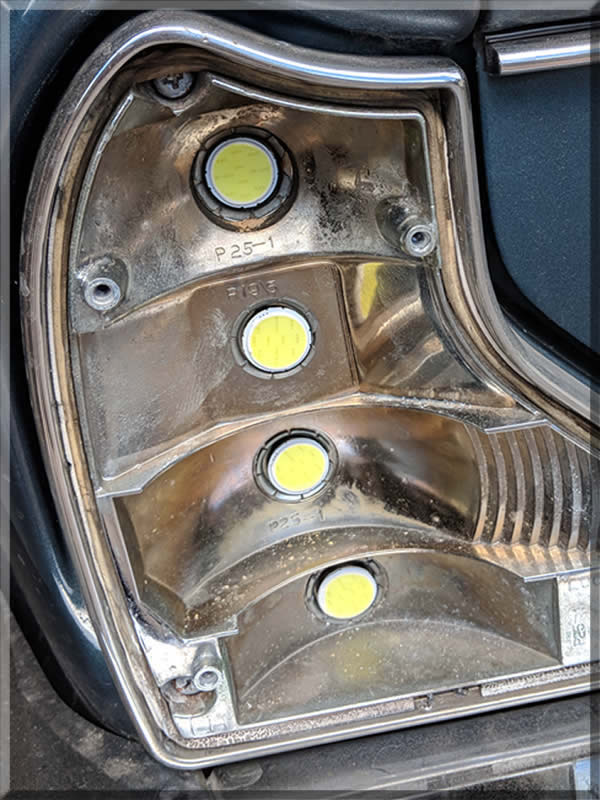
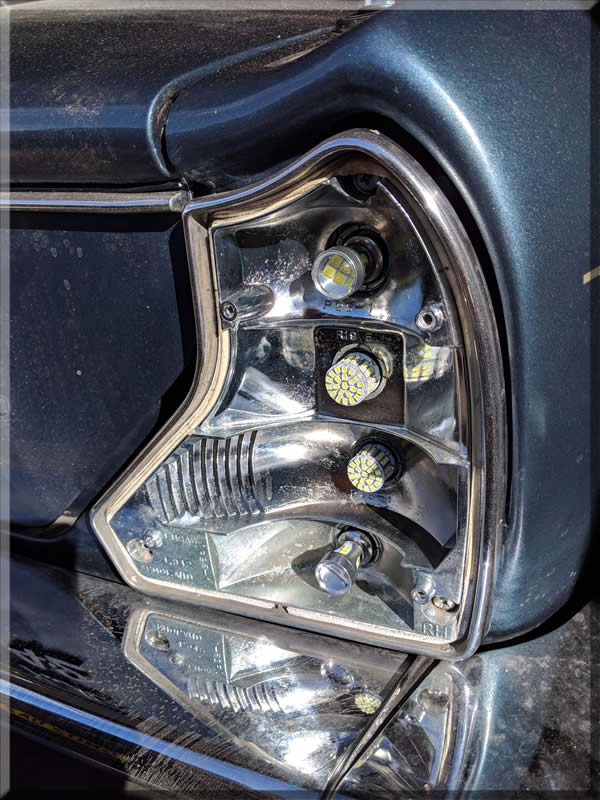
The headlights worked when they felt like it but only one at a time leaving the car with a cyclops effect. The culprit was the headlamp relay. We ordered a replacement and also decided to change all the lamp housing lens units too.
With new bulbs and now all four lamps have dip and main beam halogen bulbs with very bright led side lights on the inner two with feeds from full ignition set as DRL (Daytime Running Lights) it now looks the part and can light up the road like a modern car.
We fitted a small sensor in the top right of the windscreen which is connected to a Valeo lighting system which turns the side/heads (dip) on automatically at dusk or in a tunnel, just like a modern car.
Now on to that pesky horn.
Having purchased a Haynes manual for the car I figured I would see a breakdown of the steering wheel horn parts to find the original fault that the botched job had bypassed.
Turns out we went all around the houses to fix what could have taken less than five minutes. We removed the steering wheel and dismantled the cowl housing to fix the switch stalk assembly which was very loose and rattling around. We rebuilt it and reconnected the horn wire to find the horn was blowing all the time when the ignition was on.
This must have been the original fault and it was simply fixed by bending the bottom steering column brush back which was earthing out. So, with horn now working as it should and the steering column switches like new we looked at the dash lighting.
I was surprised to find a fibre-optic system in a thirty-five-year-old car. We soon had the dashboard shining with the addition of ultra-bright LED’s fitted in place. We also fitted LED bulbs into the tail lamp housings to brighten up the rear however we had a false start.
The first LED lamps that I purchased were flat and did not reflect in the tail housing so looked a bit dull. I replaced them with ones that look more like bulbs and they were perfect. Two types were used, ultra-bright for Stop and reverse lights and normal for side and flashers.
Because LED’s have a different resistance to ordinary bulbs the flasher repeaters on the dash didn’t work right but we have a solution for that too (more later).

The standard Jag has central locking on three doors and boot but not the driver’s door (key operated).
We fitted a door motor in the driver’s door and connected it to an Autowatch vehicle security system so now the car locks and unlocks on the remote key fob. The four-button fob allows open/ close/sound alarm and one free button which we are going to connect to a boot popper later. Finally, we connected the flasher outputs to the dash repeaters thus solving that problem too.
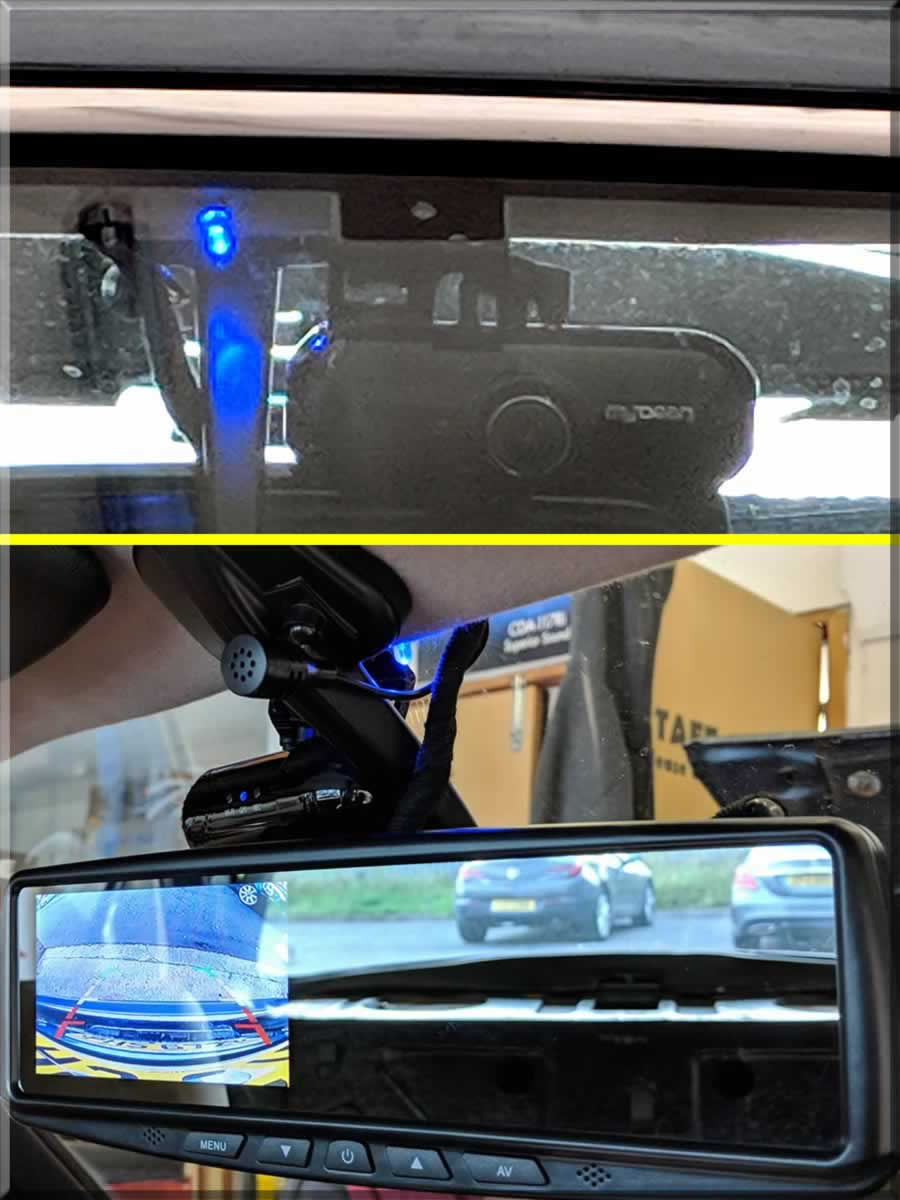
The Blue flashing alarm LED was fitted top centre of the front screen as a deterrent to thieves. Meta Shield tracking system is installed and working, this baby is going nowhere without my permission.
A small digital HUD (Head Up Display) was fitted to the top right of the dash and projects the vehicle speed in a digital display on the corner of the windscreen. Another box ticked.
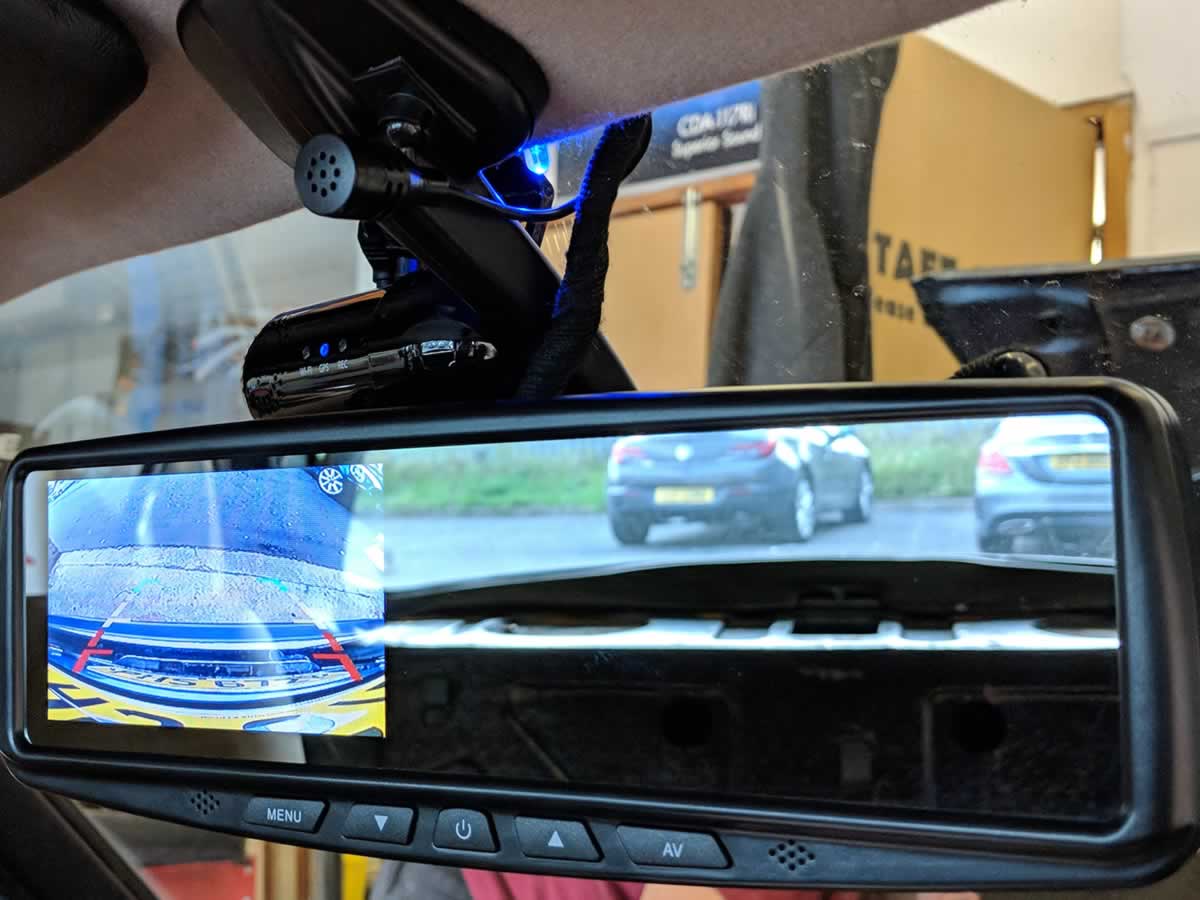
I was going to transfer the Thinkware front and back witness cameras from the Merc to the Jag but one of my suppliers asked me to try a new Dash Cam system. The C-KO front and rear DVR has a separate GPS antenna which was fitted onto the front dash. Having lived with Blackvue and Thinkware Dash Cam systems I always thought the Thinkware was best mainly because the DAB signal to the radio was not blanked out like many other DVR systems.
The software and the phone app on the new C-KO camera are much easier to use and the Wi-Fi connection is on all the time so you can see the images on your mobile device without having to click buttons on the camera. High definition images being recorded while the vehicle is parked and GPS positioning all work well. I am very pleased with this system and it is cheaper than its rivals too.

Another unique product from C-KO has solved the problem of parking this big beast.
This is the long wheelbase version and the boot is big enough to swallow a six-foot man. Getting into tight spaces is a nightmare. Fitting rear parking sensors was easy enough on the rubber bumpers although making a neat job of getting the wiring through and connected was a small challenge. The sounder was routed into the car and positioned behind the rear seat to the corner of the back shelf.
Front sensors, however, need to automatically come on at just below six miles per hour or they can be wired through a manual switch or timer delay relay. Modern cars know the road speed by CAN bus computer systems and I wanted mine to work like that but the Jag was built way before CAN was invented.
The C-KO “RS-4000-F-GPS” have a Global Positioning System (GPS) which senses the speed of the car and so work perfectly on older cars, perfect solution.


In keeping to the original brief of making the Jag as close to the Merc as possible I also wanted a rear-view camera for parking. We used a rear-view mirror monitor and a low light rear camera with guidelines fitted beside the number plate lights in the boot handle assembly.
It worked a treat, I can now inch the rear bumper to within a cat’s whisker of any obstacle.

Having established the integrity of the bodywork, we identified a couple of small welding repair jobs needing to done on the rear seatbelt floor area, so we knew we had a basically sound car to work on but the state of the dash veneers and carpets/seats would need work so we ordered a second-hand centre dash switch panel and had it reworked and film dipped to similar wood effect to the original.
It looked so good it made the main dash look shabby so I ordered on eBay another dash panel and it gets the same treatment.
The process of swapping the complete dashboard is not for the fainthearted but the end result was worth it. I asked Darren to replace the cigar lighter with an Aux/USB socket for the radio. He went a step further and altered the original Jag cigar knob to fit into the USB so disguising it. Genius!


Silencing the Cow Bells
There is a system for exhausting the interior air out through the rear shelf into the boot lid space. It utilises four flaps which ring like cowbells every time you shut the doors. The original damping material falls off through time causing the annoying ringing sound. See this forum post…
Since this car would have a serious sound system fitted and much panel damping, the last thing we need was extra unwanted resonances, so the plenum chamber and flaps were fixed.
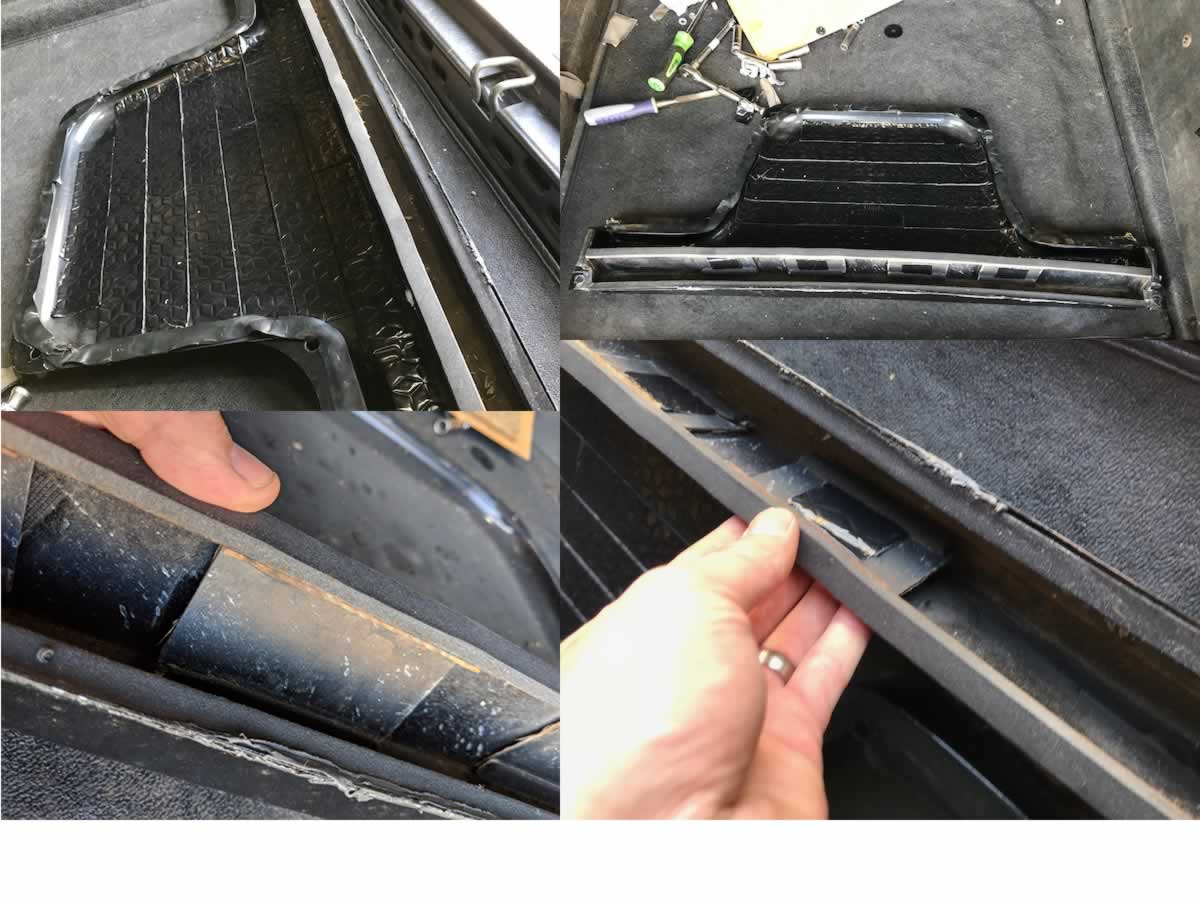

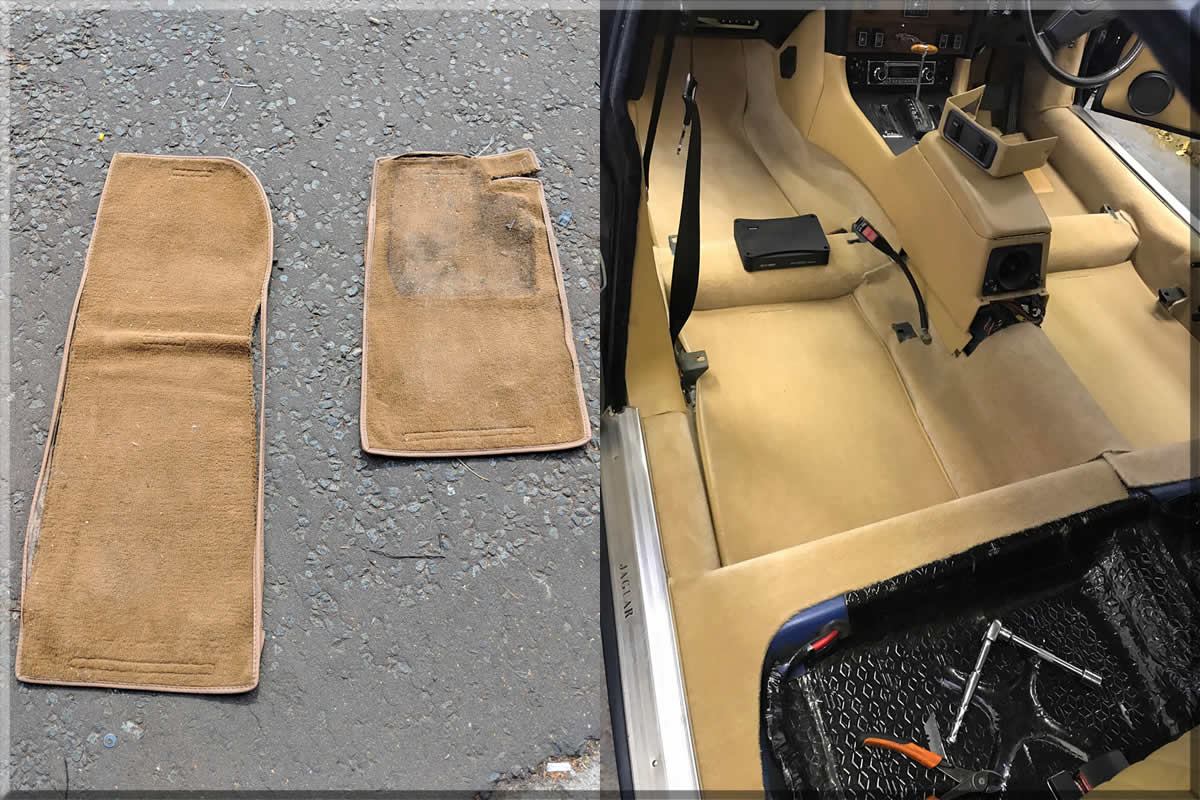
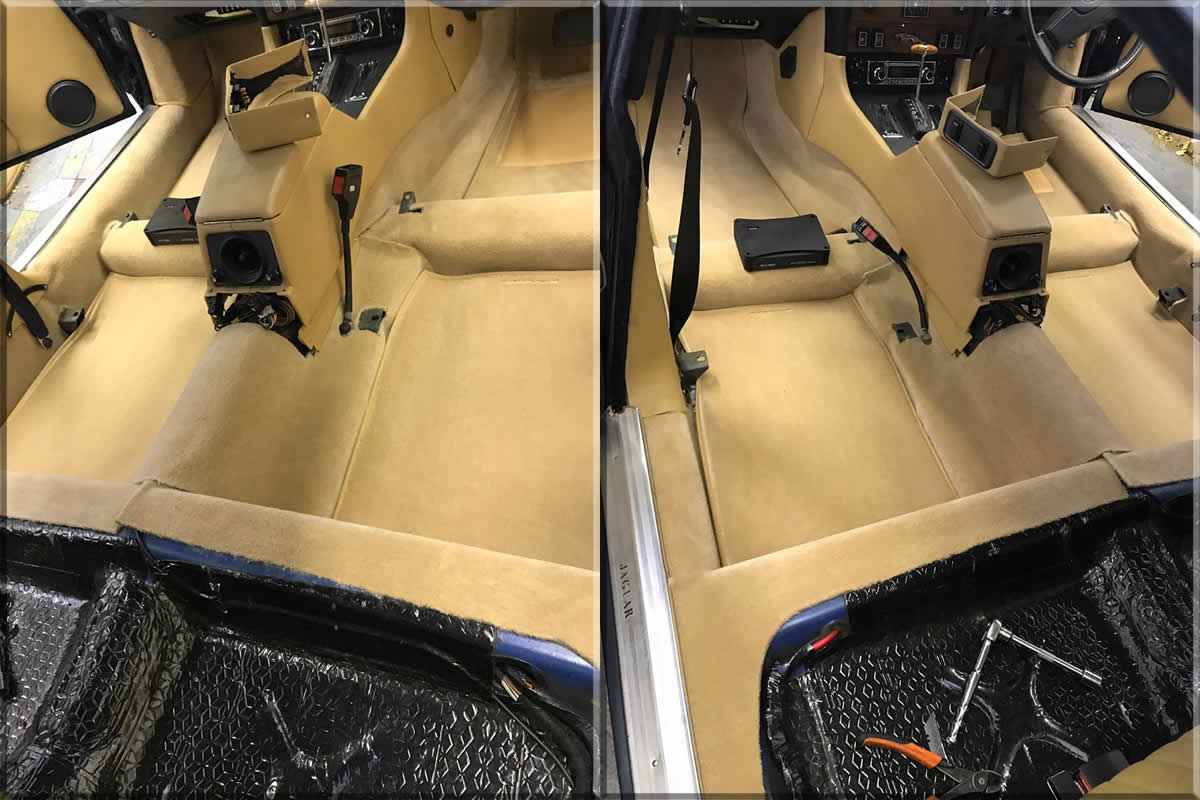
The seats and carpets in a thirty-five-year-old car were showing their age and the original plan was to get my pal David from a local cleaning company called Dry Fusion to have a look, however, having spent this much. I figured the carpets were too bad so ordered a Complete Carpet set from aldridge.co.uk The new carpets came quickly and Darren expertly fitted them, lovely!
The seats were either going to be replaced, re-trimmed or repaired so we thought we would have a go at repairing them first with a leather repair kit purchased from the furnitureclinic.co.uk Once more my young assistant who had never done this kind of work in the past has excelled and he says he enjoyed the experience.


The Audio System
Since the primary objective for this vehicle is to represent my Classic Car Stereo company we will be concentrating a lot on this subject.
I started my car audio repair business in 1975, fixing Radiomobile transistor car radios and by 1983 (the year this Jag was made) I had branches in Scotland distributing brands like Alpine, Clarion, Sony, Kenwood, JVC and Pioneer. The internet was in its infancy and things were good.
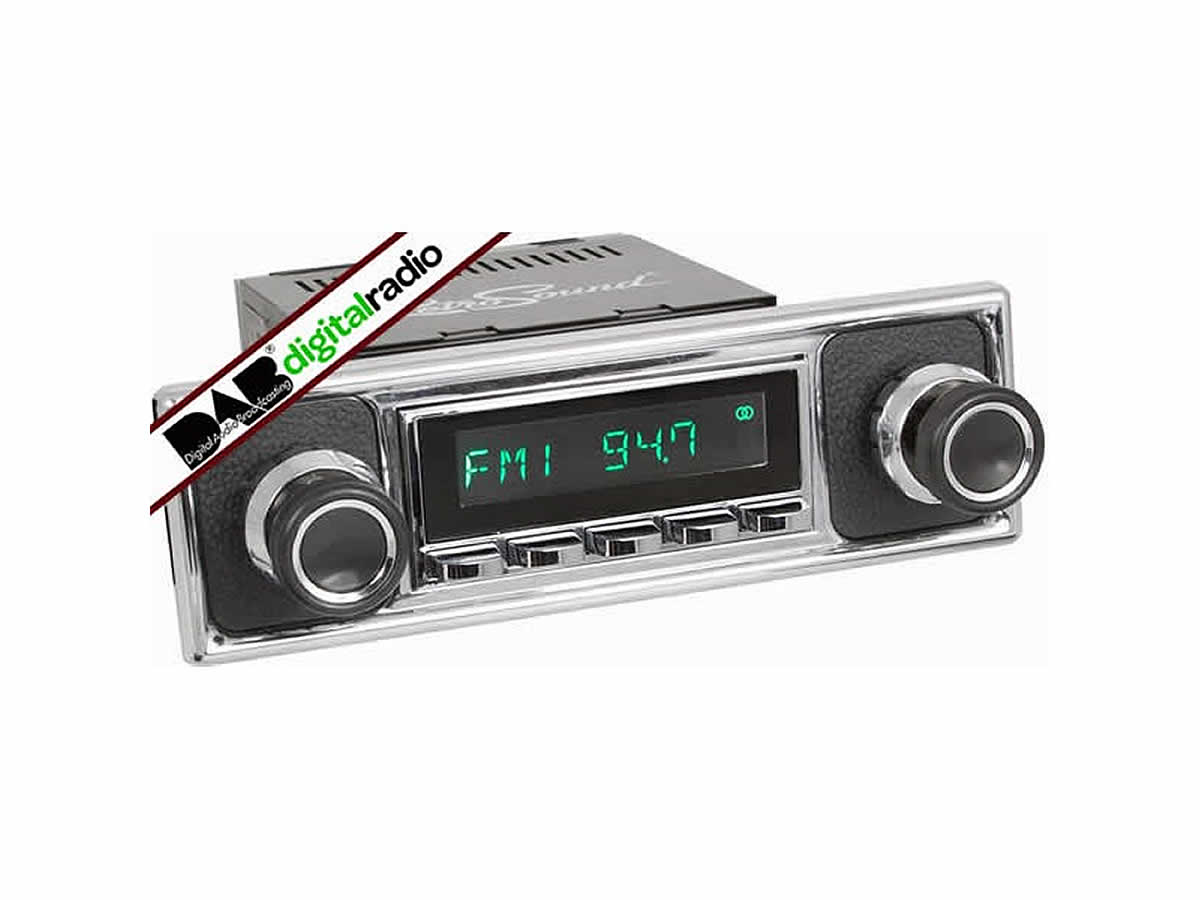
Fast forward to 2018, we no longer repair radios and most of the major brands have gone. Only Alpine is hanging in there. There was a niche in the Classic car market and an enterprising company called Retrosound working out of Henderson Nevada USA created a modular modern radio with every feature you could wish for in a unique body configuration that could be tailored to suit your individual car style. Old looking push button wirelesses with attitude were definitely the future for us. RetroCarStuff.com was created and added to our range of products, soon becoming one of our favourites.
The choice of head unit was easy, it had to be the top of the range San Diego DAB unit in Pebble Chrome which seemed to suit the Jag dash best. The San Diego is a great starting point for a full system since it has pre-outs for front/rear and sub as well as full control over all the output parameters. It can also play Mp3 or lossless FLAC files through two USB ports. Daz came up with the clever idea of making the defunct cigar lighter on the dash into a USB port and disguising it with the old cigar lighter head (see image above).
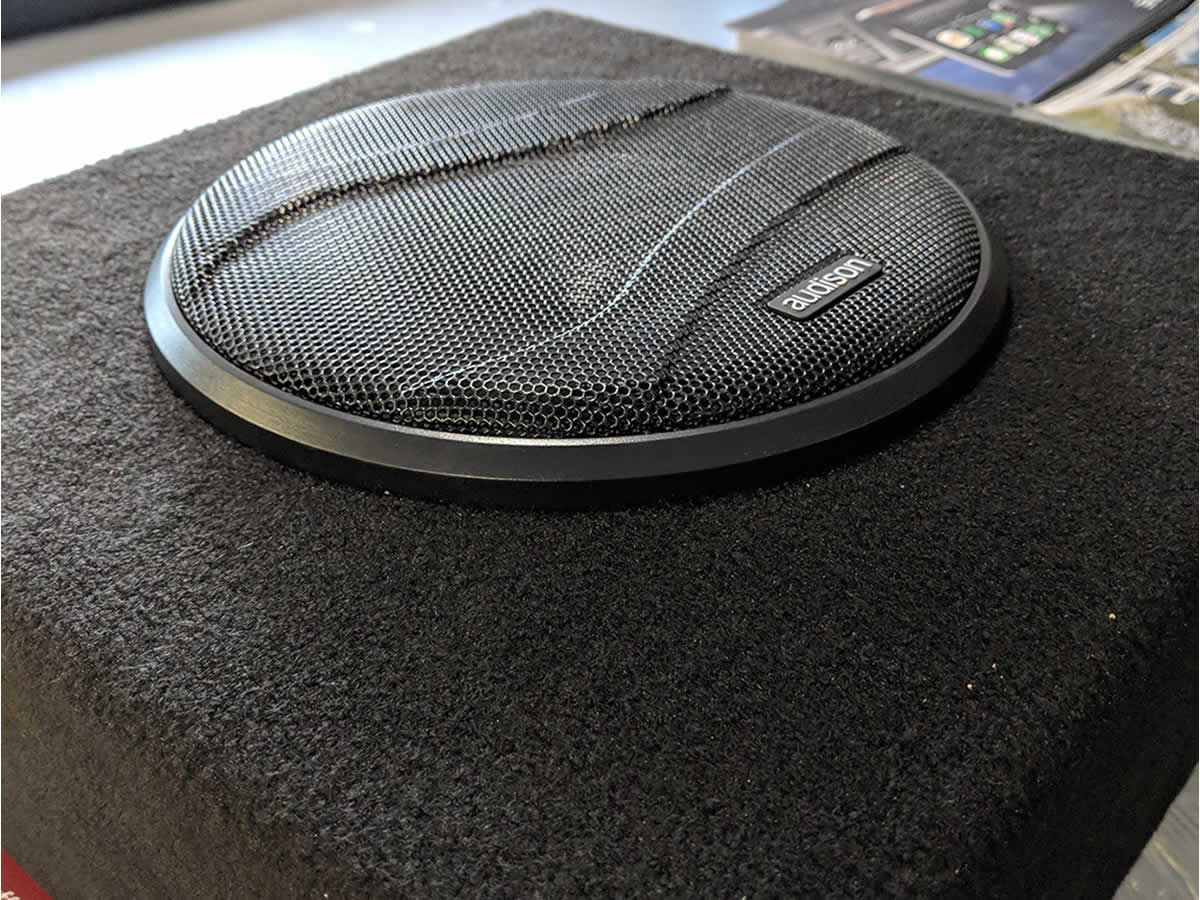
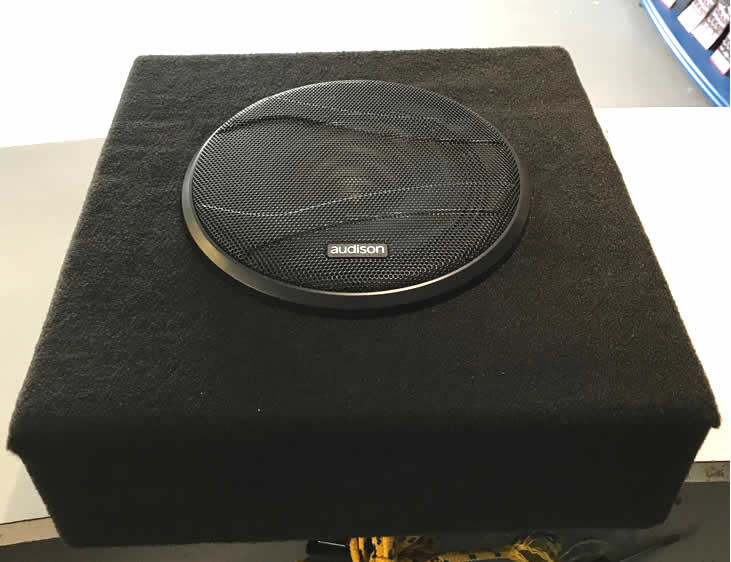
The problem was trying to make a good sound in the car without too much disruption of the original trim. The original speaker positions were only 4-inch paper coned but efficient drivers so we had to think about this. With some invisible (from the outside) modification we got 13cm Audison coax speakers in using glue and foam padding and they sound ok but obviously lack bass. Since the rear doors are only for fill-in we simply dropped some 10cm Audison mid divers in and the main music and bass was to come from some specially fabricated under seat boxes with 8-inch midrange Audison speakers and a six-channel DSP Audison amplifier. Sub-Woofers would be inbuilt to the vast boot on this car and driven by a Hertz amplifier.
Setting all this up properly was a breeze using our Audison Bit Tune computer and multi-microphone system. Once all the settings had been set and saved to the Prima amp memory we were happy in the knowledge that all the speakers were correctly in phase and time aligned to the drivers head position, and the resulting sound was amazing. True car audio Hi-Fi in this old car has to be heard to be believed.
Contact us and make a date to listen to this system 🙂
Audio Product fitted.
- RetroSound San Diego Chrome Pebble Black
- RetroSound DAB1 Splitter
- RetroSound PA02 Remote Motor Aerial
- Audison APX5 5.25″ Coaxial Door Speakers
- Audison APX4 4″ Coaxial Door Speakers
- Audison AP8 Underseat Woofers
- Audison Prima AP8.9bit 8 Channel Amplifier (Bridged to 6ch)
- Connection FPK350 8AWG Wiring Kit x2
- Hertz HCP4D 4 Channel Amplifier (Bridged to 2ch)
- Hertz DBX25 Enclosed 10″ Subwoofer x2
- Skinz Pro Bulk Pack Sound Deadening
sandiego
Retrosound San Diego head unit
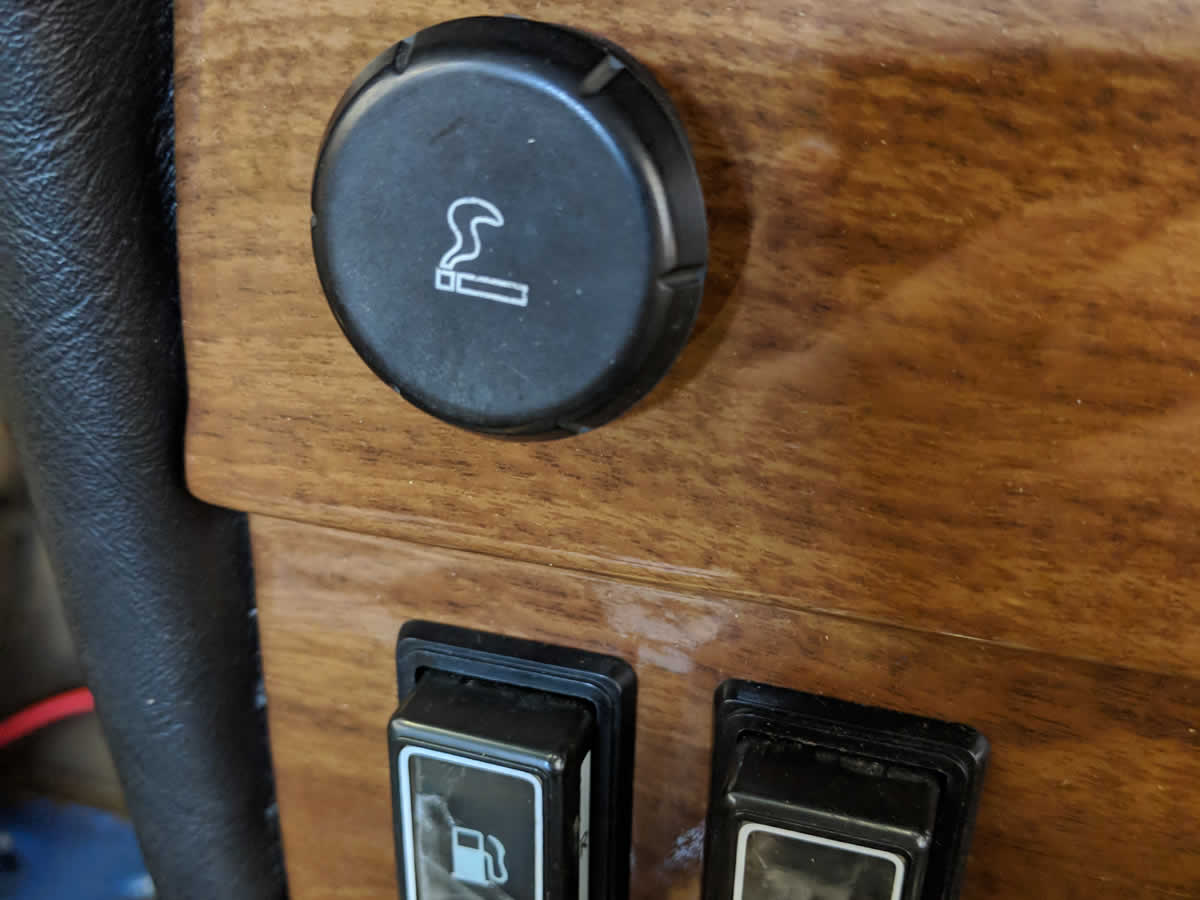
USBcover
Old cigar lighter disguised as USB
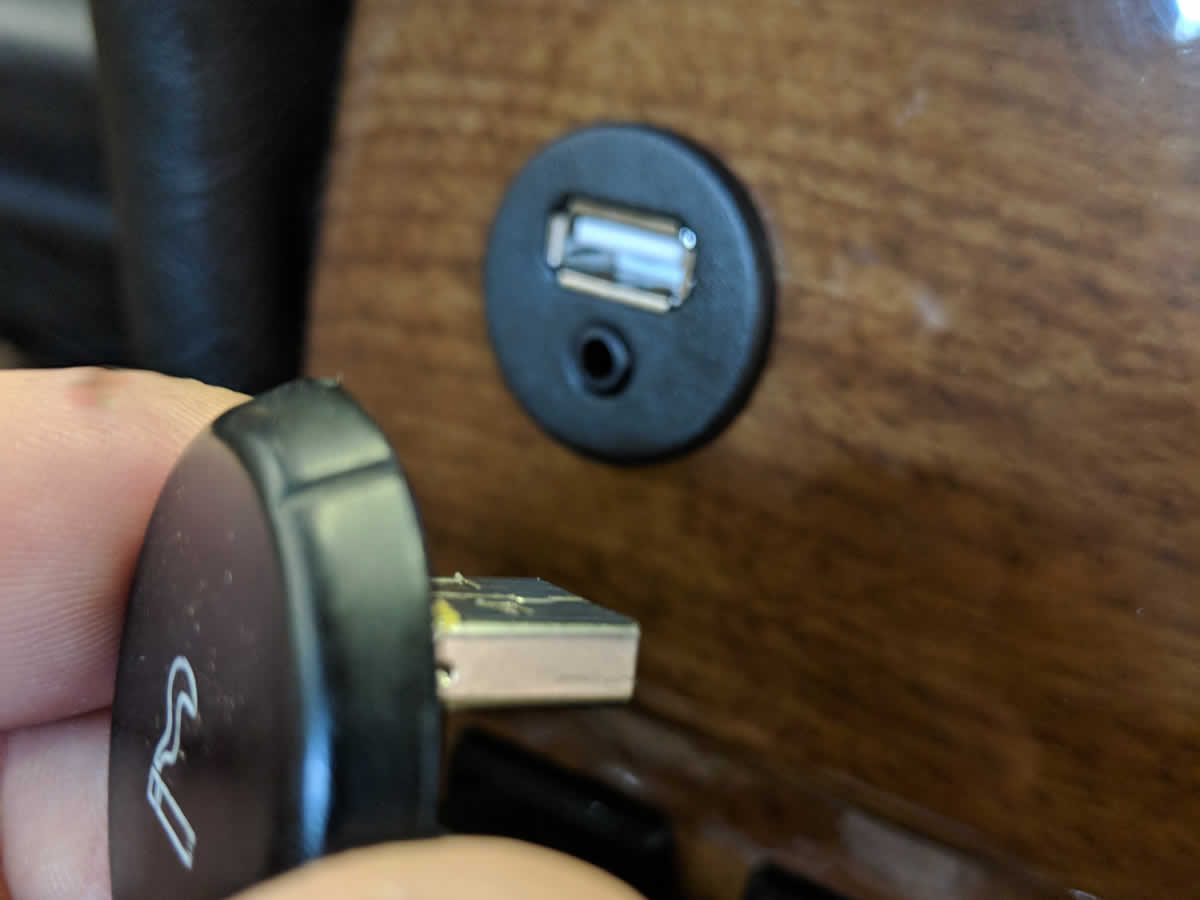
USBuncover
USB socket behind Lighter knob
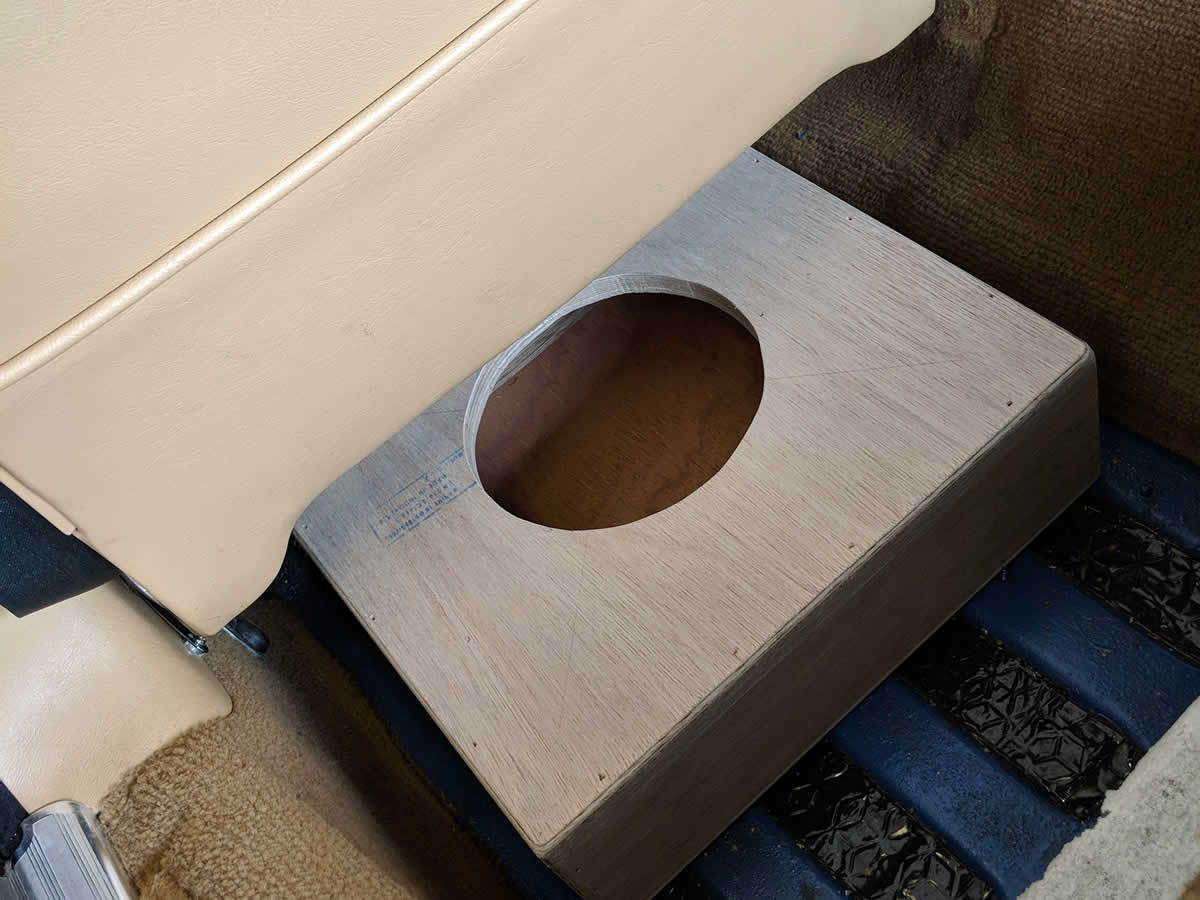
seatbox
Trying the under seat box
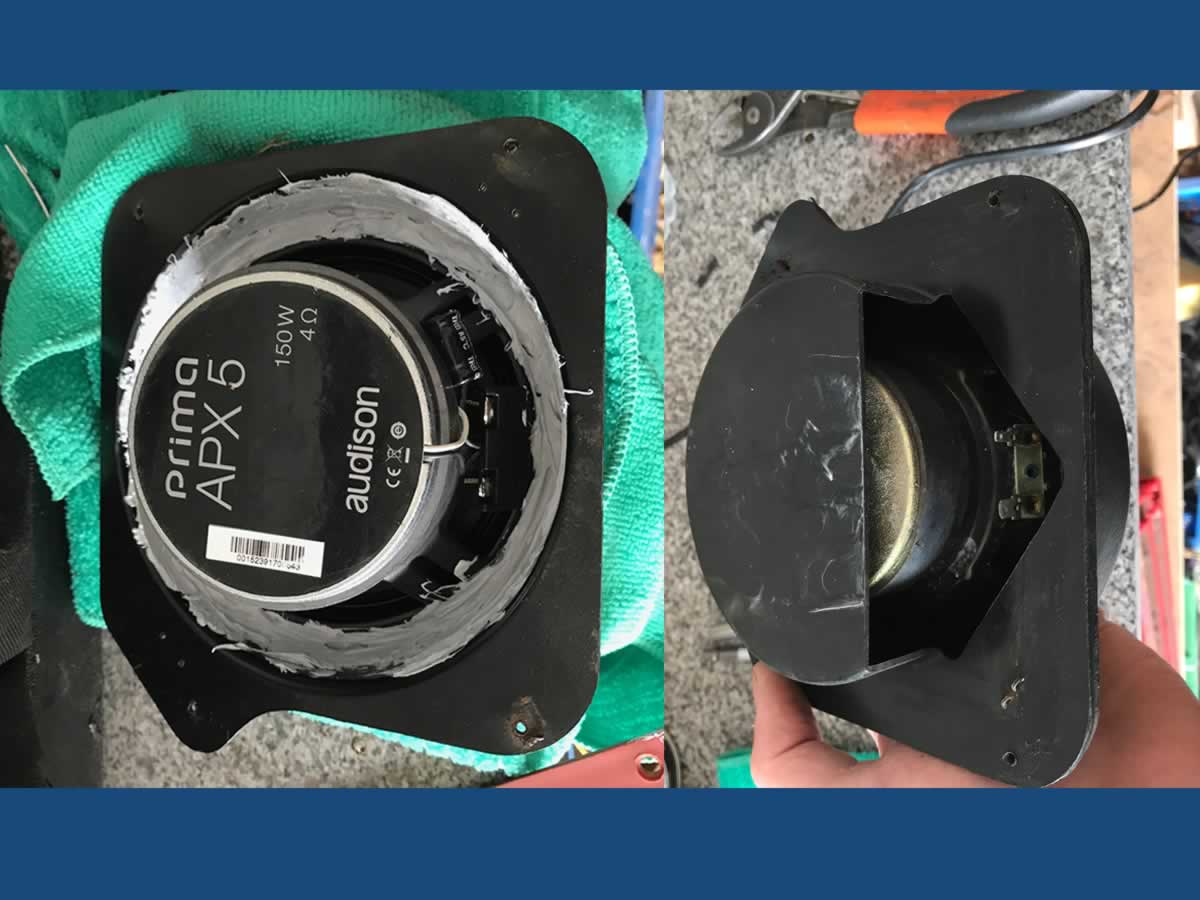
apx5
New Audison 13cm coax speakers (Front Doors)
underseatbox
Under seat box with 8 inch speaker
Undesrseatbox
Carpeted and sound deadened.
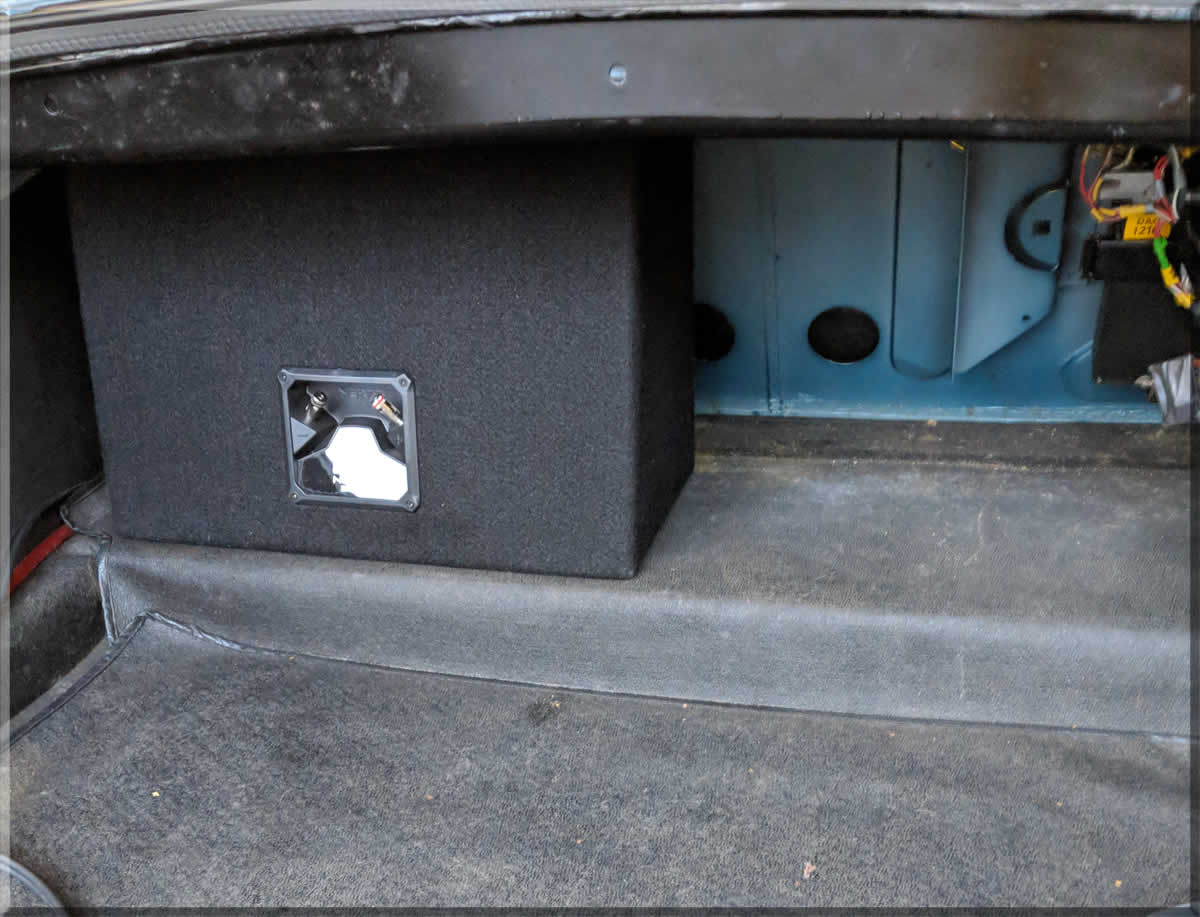
Bass1
Will we get two 10 inch subs in?
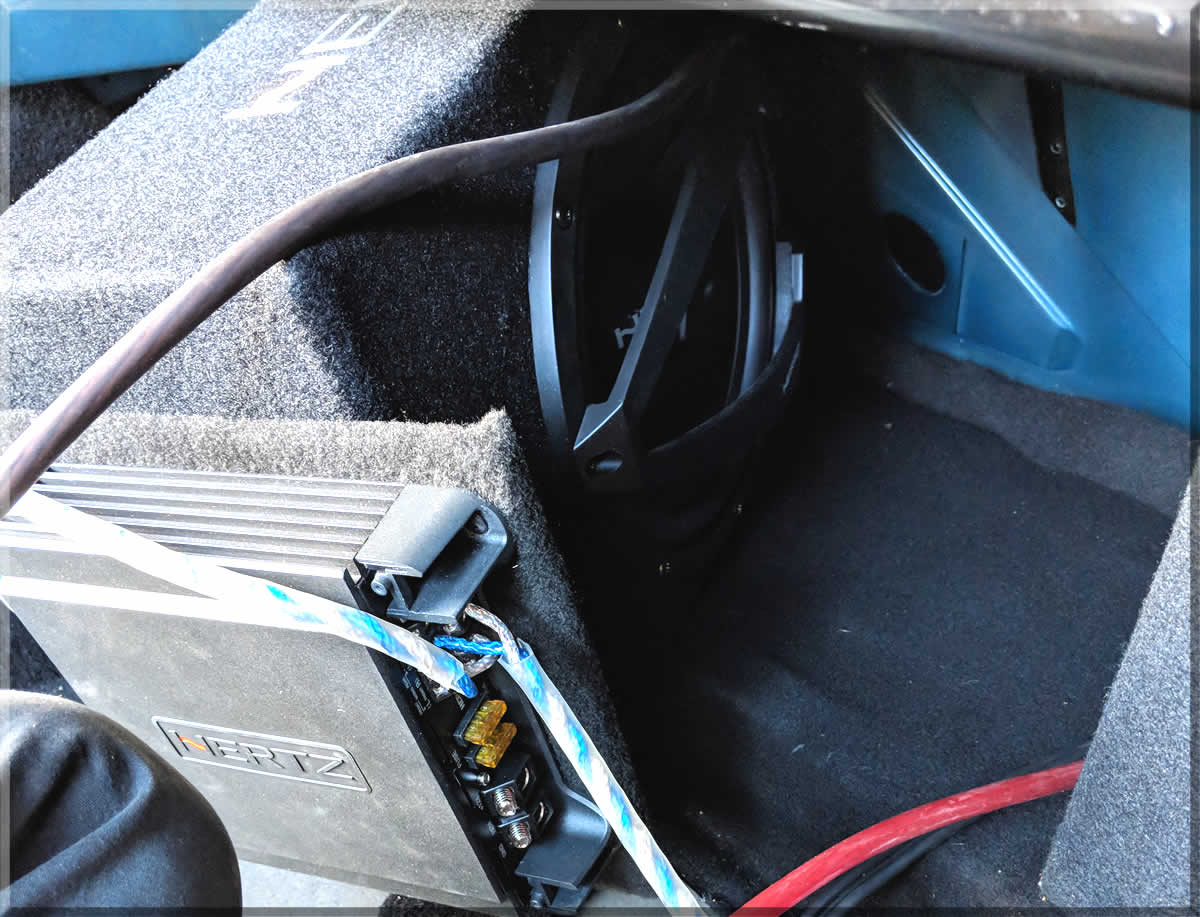
amp
with a beefy amplifter

aubsandamp
Yes! Once we moved some relays
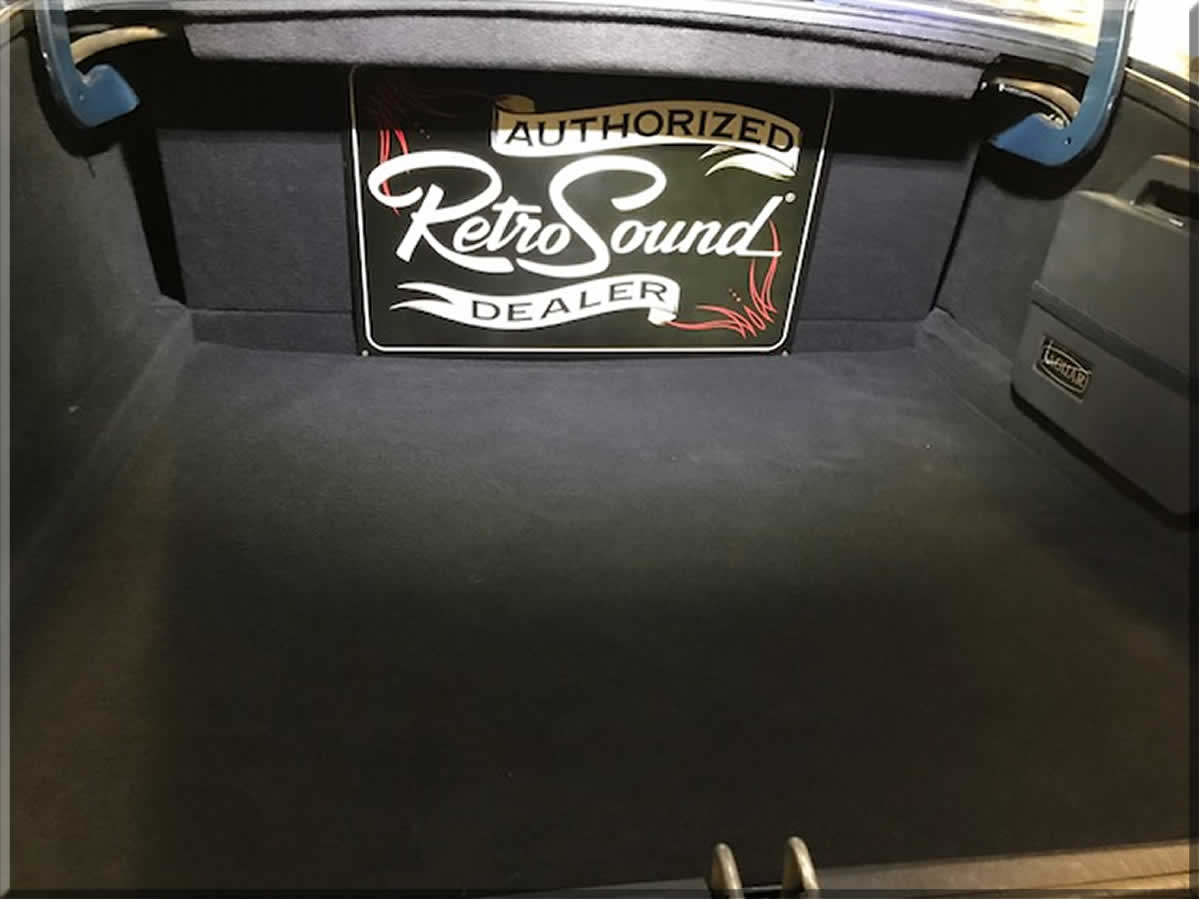
Bootsign
Finished article
JagShop
Complete with satnav